So last night the group got together to try out the rules Beneath the Lily Banners written by Barry Hilton and can be purchased as a pdf here: League of Augsburg. I have several sets of rules that I want to try out for my War of Spanish Succession project and I decided that I didn't want to wait for me to finish painting all of the troops to do so. Kevin has a great collection of 7YW Prussians and Austrians and I asked if he could bring the troops so we could run a test battle of the rules. He agreed. My fictional battle had the Austrians going up against a collation of Prussian states. I put down some terrain and Kevin brought his beautiful 28mm figures. We ended up with 10 players showing up for the game. Far beyond what I was expecting but we made it work. Andrew, who's house we game at, gave up his seat to one of the other players and helped me referee the game. Which was a big help and I should also state he had not read the rules, he worked off the of QRS and was able to keep the game flowing on his side. I think that speaks well for a set of rules if you can pick up how to play just from that. Now mind you I have not played this set before nor anyone else in the group. This was a ground level learning game. I was only expecting to get through a few turns for the night.
We ended up going through 11 turns of our battle in 3.5 hours or so. I think that is pretty damn awesome! The night did not run mistake free but we were able to move along.
I will say that we did have some issues with the idea of the Compulsory Move rules and it's position as the first step of the play sequence. That threw us off because it refers to the actions that happened on the last turn or so it would seem. For those who don't know or are interested the Compulsory Move is the action of the routing, retreating units from the last turn and if they stop in front of a friendly unit that unit is now pinned in place and cannot move. Hopefully someone more familiar with the rules will let me know if we did this correctly.
Anyway on to the photos of the game!
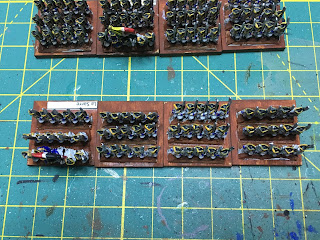
The above two photos the initial setups. The top photo are the Prussians and the above photo are the Austrians. The Prussian had a total of 25 units and the Austrians 20 units. For both sides the infantry are lined up in the middle deployed in two lines and the cavalry hold both flanks.
The Commander abilities started off with the Prussians rolling for a Commander who was a political Hack while the Austrians rolled a Commander who was very gifted in the art of war. I could have made the game balanced for a first try but decided to run with it.

After a few minutes of rule discussion the Commanders rolled up their order allowance and we were off to the races. Well the Austrians were the Prussians only ended up with 6 orders the first time around for an army with 25 units.
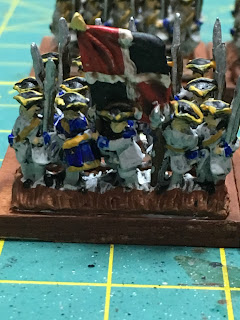
Close up of some the troops Kevin has painted.
The bulk of the orders for both sides through the first few turns went to the cavalry on both flanks. Which took off clashing into each other. The close combats are bloody. Units bounced and retreated several times over the course of the game. Tom, who was controlling the Prussian cavalry on the Prussian right couldn't roll higher than a 3 on his morale rolls. His troops spent more time falling back than pushing forward. I felt bad for him.
The Austrians break through on the Prussian right.
A nice close up of some the Austrian cavalry.
The Austrian guns did a great job sniping at the Prussian troops from that hill.
The backs of some of the Prussian forces.
The above two photos are Peter's Austrian cavalry against Andy's Prussian cavalry. The two flowed back and forth with melees all night. The virtually wiped each other out on the Prussian Left.
The Austrian center drawn up in two lines of battle. They slowly marched to meet up with the Prussians.
More cavalry action the Prussian right flank. The woods became known as the bloody woods.
Looking over the Prussian commanders shoulder at his lines of battle. Due to his low Commander rating he opted to sit and wait for the Austrians and gave most of the orders to his cavalry.
Austrian cavalry pushing forward on the Prussian left.
Peter and Dave (the Commander of the Austrians)
Quick overview of the battle around turn 9 or 10. You'll notice the center forces didn't move very far. I'm not sure if I should have started the infantry closer to each other or not. Maybe a just outside of long musketry range which is 12 inches.
Towards the last few turns the Austrian infantry took off, of course at this point most of the cavalry was routed or killed.
These last 3 photos are the last 3 turns of the game. Austrians finally crested the and the Prussian artillery opened up on them. Both sides failed to really use musketry at all during the game. We called the game because it was getting late but we did feel that the game had run itself out. The Prussian commander was one stand shy of having to worry about losing his army morale.
My closing thoughts about the system.
Overall we enjoyed the game. A few more times playing them will tighten things up of course.
After having read through them a few times prior to play I wasn't confident that I had the flow correctly and some of the rules didn't make sense while I read them. Having gone through a game now I would say they flow better while being played then if you have to read them. Mostly that comes from rules that pertain to other actions that can/will happen being spread out throughout the rule book. A really good index at the back of the book would help immensely with that.
The whole compulsory move section still has me scratching my head.
The fire mechanics are good. The idea that you only roll one die which is then modified and then you look at a chart and find a column for the number of stands firing is a nice way to resolve fire. I also like that there are no saving throws. I hate that!
Close combat works similarly but the modifiers add dice to your hand they don't modify the die/dice you are rolling.
The situation of interpenetration took some getting use too. If a unit falls back/routs/retreats through a friendly unit it disorders not only itself but the unit it ran through. Provided the retreating unit clears the unit it fell back through that disorder is temporary and goes away provided that unit does not move. It's not clear when that actually happens, or I totally missed it in the rules. The same thing would happen if a unit is crossing fence. It will be disordered but only temporarily so long as it clears that fence on that move, if not it stays disorder and requires a "Form" or rally order to clear the disorder.
I only used one optional rule which was for the Army Morale. There are a few optional rules but I wanted to stick with the basics at first.
We will try these rules again in the near future. I hope you enjoyed this little write up.


